Sunday, April 24, 2011

Curry Chicken

My oh my it has been a while! Apparently having an absent husband and wild appetite has decreased the desire to both cook nice meals and, on the occasion we do, document them. But oh oh oh! Relief is here! Thats right folks, Mr. Mitchell is back. Here to catch you up on the last 6 plus months of news and foodie goodness.

As if you didn't already know, there is a Miss Mitchell on the way! Little Olivia Charlotte is expected early July (so expect another very long absence). We've done a lot of planning and preparing for the next big chapter.

It was the best of food (made at home), it was the worst of food (fast food in the field). A tale of two stomaches, really. But now to the subject at hand. Yes, it is easter and we decided to make something special and involved. We haven't had a whole chicken in a while so I decided that was the plan. But what flavor profile? Italian? Asian? Lemon-rosemary? GARLIC!?!? Nah, decided to go with an Indian coconut curry. A good decision it was as well. Let's get started, shall we?

Curry Grilled Chicken

Ingredients:
1 Whole Young Chicken
1 can Coconut Milk
3 tbsp Curry Spice
1/2 cup chopped Cashews
1 tsp chopped fresh Oregano
1 tbsp Salt
1/2 cup chopped fresh Pineapple
1 to 5 diced Thai Chiles (depending on your heat desire)
1/2 large Onion, diced
2 large cloves Garlic
1 cup Jasmine Rice
1/2 cup whole Cashews
1/2 can Chicken Stock

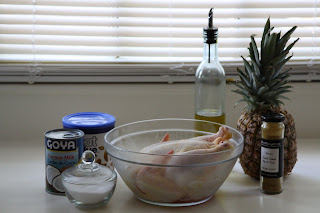
Basic Ingredients

 The first step is to get the chicken ready, I always like to marinate my meat. You could use a rotisserie to cook it, or you could save a few hours and go the flat grill method that I have come to love. Don't know how to properly flatten a whole chicken? Well well, here we go.

First step is to cut out the spine. Grab the tail and cut up each side with strong kitchen sheers.


Remove spine and throw at someone squeamish.

Time to break away the breastbone. Two options, grab the outsides and pop the breast bone in...

Or put it breast up and punch the crap out of it until you hear a snap.

Time to remove the bone, pull, cut if you need to.

End up with this, and as little waste as possible.

Now that the chicken is prepared time to work on the sauce. Either use a nut grinder or chop chop.

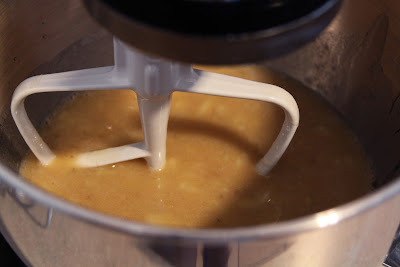
Mix up the coconut milk, cashews, curry, oregano, and pour over the chicken either in a deep dish or bowl... like so.

 Cover and store for a few hours.


One of my favorite little tricks is the brick on the grill. This does require an unexplained brick just lying around the kitchen, but if you've got it, use it. As you preheat the grill, wrap the brick in aluminum foil and get it hot.


Place the chicken on the grill boobies down and place the brick atop. Save the extra juices that remain in the bowl for about two steps from now.


The best way to keep track of "doneness" is to use a thermometer stabbed into the thigh. But expect 20-30 minutes per side with the brick method.

Now to the sauce. Pour the left over marinade into a sauce pan, add chicken stock, diced Thai chiles, 1 clove chopped garlic and diced pineapple. Heat and reduce.

These are green Thai chiles, they're friiiiiiiggin hot.

Oh it might be time to flip the chicken.

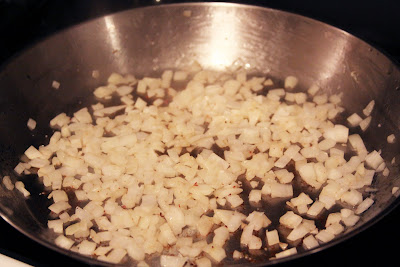
 The rice preparation is pretty straight forward. Saute the onion in a little oil with 1 clove chopped garlic. Cook the rice, add the onion mixture and whole cashews when done. But try to time all this about when the chicken is done.

No, I will not show you how to cook rice.

So at this time you should have prepared rice, sauce and chicken. We decided to throw a couple corn on the cobs on the grill along with the chicken. 

Fancy smancy presentation not required, but always recommended.

Pour on the curry sauce. Linda Blair much?


Quarter and serve. It may not be a traditional Easter feast, but its a good one.

Cheers.
Tuesday, October 12, 2010

Easy Breakfast Skillet

I've been terrible at keeping up with this blog lately and I apologize.  I've been working a lot and any time I get any free time, I have to do laundry, clean, or go to a practice for either tennis, softball, or soccer.  I typically don't get home from any of my activities or job until after 7 and by that time, it's dark and there's no point taking pictures of food because they look like crap.  Josh has also been gone a lot this month so being alone, I don't feel like cooking nice meals anyway. 

I managed to cook a decent breakfast one day when I didn't go in to work so early last week.  It's one of my easy favorites that I usually make when I have a bunch of veggies about to go bad or just lying around because it's very forgiving as far as ingredients go.

This is how I made mine: 2 servings, 30 min

2 tbs olive oil
3-4 decent-sized red potatoes, chopped into 1/2" cubes
1 small sweet onion, chopped
1/4 red bell pepper, chopped
1/4 orange bell pepper, chopped
1/4 yellow bell pepper, chopped (or about 1 small red bell pepper if you don't have the others)
2 jalapenos, seeded and minced
5-7 slices low-sodium turkey bacon, chopped (optional)
2-3 cloves garlic, minced
2 tbs fresh chopped parsley
1 tsp cumin
salt and pepper to taste

2 eggs (optional)


Start by whipping out your cast iron skillet (that's why it's called a "breakfast skillet") and heating the oil over medium-high heat.  Add the onions and potatoes and let them cook until the onions are juuuuuust starting to get translucent.


While the potatoes are cooking, chop your peppers.  When the skillet contents are ready, add the peppers and give it a stir.


Add a pinch of salt and pepper to the mix and let cook another 3-5 minutes, stirring occasionally to make sure the potatoes get cooked evenly and nothing is getting burnt to the bottom of the pan.


When the potatoes are almost completely tender, add the garlic, bacon, parsley, and cumin.  Stir to combine and let cook until the garlic is very fragrant and the potatoes are soft.  If you want, you can use regular bacon but add it to the pan at the beginning with the onions and potatoes and only use 1 tbs oil.  It's quite a bit greasier than my bacon so it'll lube the pan up all by itself once the fat renders out.


Oh goodness, smell that garlic!  Add a touch more salt if you think it's necessary.  You must taste throughout the process to get the right flavors!


While your skillet is finishing up, get a pot of salted water boiling.


I have these cute little egg poachers from my personal Heaven, Crate and Barrel.  I've tried many times to poach eggs the old-fashioned way but it's very difficult to get right without having boiled egg ribbons all over your pot so go ahead and spend the $4 to get one.  It's totally worth it.


Boil the eggs until the whites are almost completely opaque.  I found myself needing to use a spoon to flip the egg over in its little cup to properly cook the top.


What you end up with is a relatively quick, healthy, hearty breakfast that will keep you full well past when you think you should be eating lunch.  That's always a plus for me.  Cereal or smoothies sometimes just don't do it and I'm hungry an hour later.


Not so in this case.


The egg puts that perfect finishing touch on this dish.  When you split it open and the gooey yolk spills out over the potatoes and veggies, it adds this wonderful softness and creaminess to an otherwise rather business-like meal.  You can easily make this dish vegetarian by leaving out the bacon and egg, but what's life without bacon?  Yeah, that's what I thought.

Saturday, October 2, 2010

Banana Chocolate Chip Muffins

I used to only grudgingly eat bananas when my dad told me I needed to eat them before playing soccer.  Something about being told to do it made this otherwise delicious fruit not taste good.  Now that I decide for myself what to eat, I love bananas.  Sometimes I buy too many though (as many of you may have done as well), and they start to get brown and soft.  Even though they aren't so perfect anymore for peeling and eating, they are perfect for baking. I found this recipe in its original form in Food & Wine.  Like I do, I changed out the white flour for whole grain and the sugar for honey.  The only things you need to change when making this substitution are to lower your oven temp a little and use about 25% less honey since it's sweeter than sugar.  The honey caramelizes more than sugar so the final product will be darker in color but not at all burnt so don't worry.  I also used dark chocolate because I like how the delicate bitterness tones down the sweetness of the rest of the ingredients. 

Makes 36 muffins:
2 cups mashed overripe bananas (about 6)
1 cup honey
1 1/2 sticks unsalted butter, melted
3 large eggs
2 3/4 cups whole wheat flour
2 1/2 teaspoons baking soda
1 teaspoon salt
1 1/2 cup dark chocolate chips (10 oz or almost a full bag)


Mix the dry ingredients (besides the chocolate) in a bowl and set aside.


Mash the bananas in a mixing bowl until smooth.


 Mix in the butter, honey, and eggs.


 Then slowly add the dry mix until smooth.  You may need to scrape down the sides from time to time.


Add the chocolate chips and hand mix until thoroughly incorporated.  


Fill your muffin cups almost to the top since these don't rise much.


 Bake at 325 degrees for about 25 minutes or until a toothpick comes out clean.


Josh and I both have a bad habit of eating these before they're cooled properly.  We have the burns to prove it.  It's just so hard to resist chocolate chips all melty and fresh out of the oven!


Josh loves these muffins for breakfast.  This particular batch only lasted 3 days just between the two of us because he took about half of them out to a multi-day field job and barely ate anything else.  I can't really blame him.  All the guys at the site ever buy for the crews is pizza and fried crap.  Even still, these muffins are amazing and if he hadn't taken them away, I would have scarfed them up for myself.  It's dog-eat-dog in our house with my cooking.  If it's yummy, you'd better eat it before someone else does.  Maybe that's why we can't seem to lose weight...oh well.  I don't make the muffins every day so they're a nice treat.  They're whole grain and use honey and bananas instead of sugar so there are way worse things you could snack on.  Enjoy!

Tuesday, September 28, 2010

Blueberry Pomegranate Tea Blend

Even though I'm from the South, I hate tea.  Everyone I know thinks I'm crazy and I just haven't found the right one so they try to make me taste this kind or that kind...I just don't like tea.  I know it can have ridiculous health benefits, though so just like my resolution to eat more vegetables, I resolved awhile back to find a way to be able to drink tea. 
I've already talked about my love for blueberries and it just so happens that they're about as good as fruit gets as far as healthy benefits.  Minute Maid has a great blueberry pomegranate juice blend that I discovered a couple years ago.  Like any juice, even 100% juice, it's full of sugar so I diluted it with a little water at first, then thought maybe I should sneak in some tea.  This is what I came up with.


6 c boiling water
6 teabags- blueberry, raspberry, pomegranate, mixed berry, or any combination thereof (I used half blueberry and half raspberry)
24 oz blueberry pomegranate juice


I use a large measuring cup to microwave the water for a couple minutes.  I just throw the tea bags into the pitcher I'm going to use and pour the water over the top.


Let it steep for about 30 min.


Add the juice and refrigerate.


This is my favorite post-workout drink.  It's sort of like my Bluetini but without the gin.  It's refreshing and healthy without all the sugar of straight-up juice.  You could even throw a few frozen blueberries in there instead of ice.  I used to use more juice in the mixture but I've slowly been raising the tea-to-juice ratio.  Pretty soon, I might be able to just drink the tea but for right now, why mess up a good thing?

Tuesday, September 21, 2010

Salmon Sashimi and Black Rice

I'd never heard of black rice until I saw a Food & Wine recipe for "Fried Forbidden Rice".  I thought it sounded exotic and at the very least, a different color so I set out on a search for it.  It has taken several months to locate some black rice because my local Asian market didn't carry any and I only recently went to my beloved H-Mart in Dallas when driving Josh to the airport.  The package was completely written in Mandarin so I just went on my previous knowledge of rice for cooking procedure. 

Rice, 2 servings:
4 cloves garlic, peeled
2 tbs vegetable oil
1 c black rice
1 c water
6 slices turkey bacon, coarsely chopped
1 small onion, diced
2 tbs low sodium soy sauce
salt
2 tsp Chinese five-spice
4 scallions, coarsely chopped

Sashimi, 2 servings:
6oz sashimi-grade salmon
thyme sprigs
lemon slices
drizzle of low sodium soy sauce


Slice the sashimi into 1/4" strips.  Lay down one piece of fish, then put a sprig of thyme on it, then put down a slice of lemon.  Repeat the sequence until you run out of fish.


Cover with plastic wrap and refrigerate for a couple hours to let the thyme and lemon infuse the fish ever so slightly.


Peel the garlic and place it on a sheet of foil. Drizzle it with a bit of oil and seal the foil into a secure package.


Bake at 350 for 30 minutes.  If you multiply the recipe, add some time.  The original recipe called for 12 cloves to cook for an hour so just go by that scale.


It should look like this when it's done.  Soft and caramelized.  It was all I could do to keep from just spreading this roasted garlic on a cracker and scarfing it down right then and there.  The lovely aroma that filled my house made me want to roast some garlic every morning to start my day.  It isn't a smell like sauteing garlic.  It's sweeter and more earthy.  Very nice.  I'll stop now and continue.
Wrap the garlic back up and refrigerate for a couple hours.


For the rice, give it a little rinse in a strainer then put it in a saucepan and cover with the water.  Bring the pot to a boil then reduce the heat and simmer for about 20 minutes.  After that time, use a fork to taste a little.  It is going to have a slightly heartier texture than white rice or even brown rice but if it's crunchy, add another tablespoon of water and simmer another 5 minutes or so until it's done.  Let the rice cool and refrigerate overnight.  If you suck at planning like I do, just refrigerate until the rice it's cold.  It's best when left overnight but the rice will gum up and stick to your pan if it's used right after cooking so cool it off for as long as you can for the best results.


When you're finally ready to put everything together, chop the bacon, onions, and scallions.  Also chop up the garlic.  The original recipe would have you leave the cloves whole but I like to get a little of everything in each bite so instead of having one bite of garlic and one bite of rice, I opted to mince the garlic before adding it to future steps.


Put a tablespoon of oil in a skillet and cook the bacon for about 7 minutes or until cooked through and slightly crispy. 


Transfer the bacon to a holding container, pour in another tablespoon of oil, and saute the onions until translucent and tender.  Throw in a dash of salt for seasoning (Using pork bacon produces a good deal of grease so you can just use that oil to cook the onions but I only buy low sodium turkey bacon so I needed to add oil).


When the onions are ready, add the bacon, rice, garlic, soy sauce, and five-spice.  The original recipe called for white pepper but I love the warmth of the five-spice so I made the call to change it up and it turned out perfect.  Cook everything together, stirring or tossing frequently, until thoroughly warmed and all the ingredients melded together.  Garnish with the scallions and serve.  Take out the sashimi and drizzle it with a bit of soy or ponzu sauce.


What you end up with is a delicious, nutty rice dish with a refreshing, cool sashimi dish.


The black rice barely tastes like rice.  It has such a wonderful nutty flavor that is unlike anything you've ever had. It quickly became one of the foods I want lots more of and a food around which I want to develop new recipes.  The rice was amazing all by itself and could have stood alone because of the meatiness of the bacon and the nuttiness of the rice.


I had the salmon left over from some sushi I made and didn't want its freshness to be wasted by cooking.  Adding fresh herbs and lemon to anything just adds a crispness that can only be magnified by the final dish being served cold.  It was a delightful complement to the hearty rice dish and every hard-to-find ingredient is totally worth the final result.

*Black rice, or more specifically Forbidden Rice, is very high in the antioxidant anthocyanin.  It is also very high in iron and fiber.  Yummy AND healthy!