Showing posts with label vegetarian. Show all posts

Tuesday, October 12, 2010

Easy Breakfast Skillet

I've been terrible at keeping up with this blog lately and I apologize.  I've been working a lot and any time I get any free time, I have to do laundry, clean, or go to a practice for either tennis, softball, or soccer.  I typically don't get home from any of my activities or job until after 7 and by that time, it's dark and there's no point taking pictures of food because they look like crap.  Josh has also been gone a lot this month so being alone, I don't feel like cooking nice meals anyway. 

I managed to cook a decent breakfast one day when I didn't go in to work so early last week.  It's one of my easy favorites that I usually make when I have a bunch of veggies about to go bad or just lying around because it's very forgiving as far as ingredients go.

This is how I made mine: 2 servings, 30 min

2 tbs olive oil
3-4 decent-sized red potatoes, chopped into 1/2" cubes
1 small sweet onion, chopped
1/4 red bell pepper, chopped
1/4 orange bell pepper, chopped
1/4 yellow bell pepper, chopped (or about 1 small red bell pepper if you don't have the others)
2 jalapenos, seeded and minced
5-7 slices low-sodium turkey bacon, chopped (optional)
2-3 cloves garlic, minced
2 tbs fresh chopped parsley
1 tsp cumin
salt and pepper to taste

2 eggs (optional)


Start by whipping out your cast iron skillet (that's why it's called a "breakfast skillet") and heating the oil over medium-high heat.  Add the onions and potatoes and let them cook until the onions are juuuuuust starting to get translucent.


While the potatoes are cooking, chop your peppers.  When the skillet contents are ready, add the peppers and give it a stir.


Add a pinch of salt and pepper to the mix and let cook another 3-5 minutes, stirring occasionally to make sure the potatoes get cooked evenly and nothing is getting burnt to the bottom of the pan.


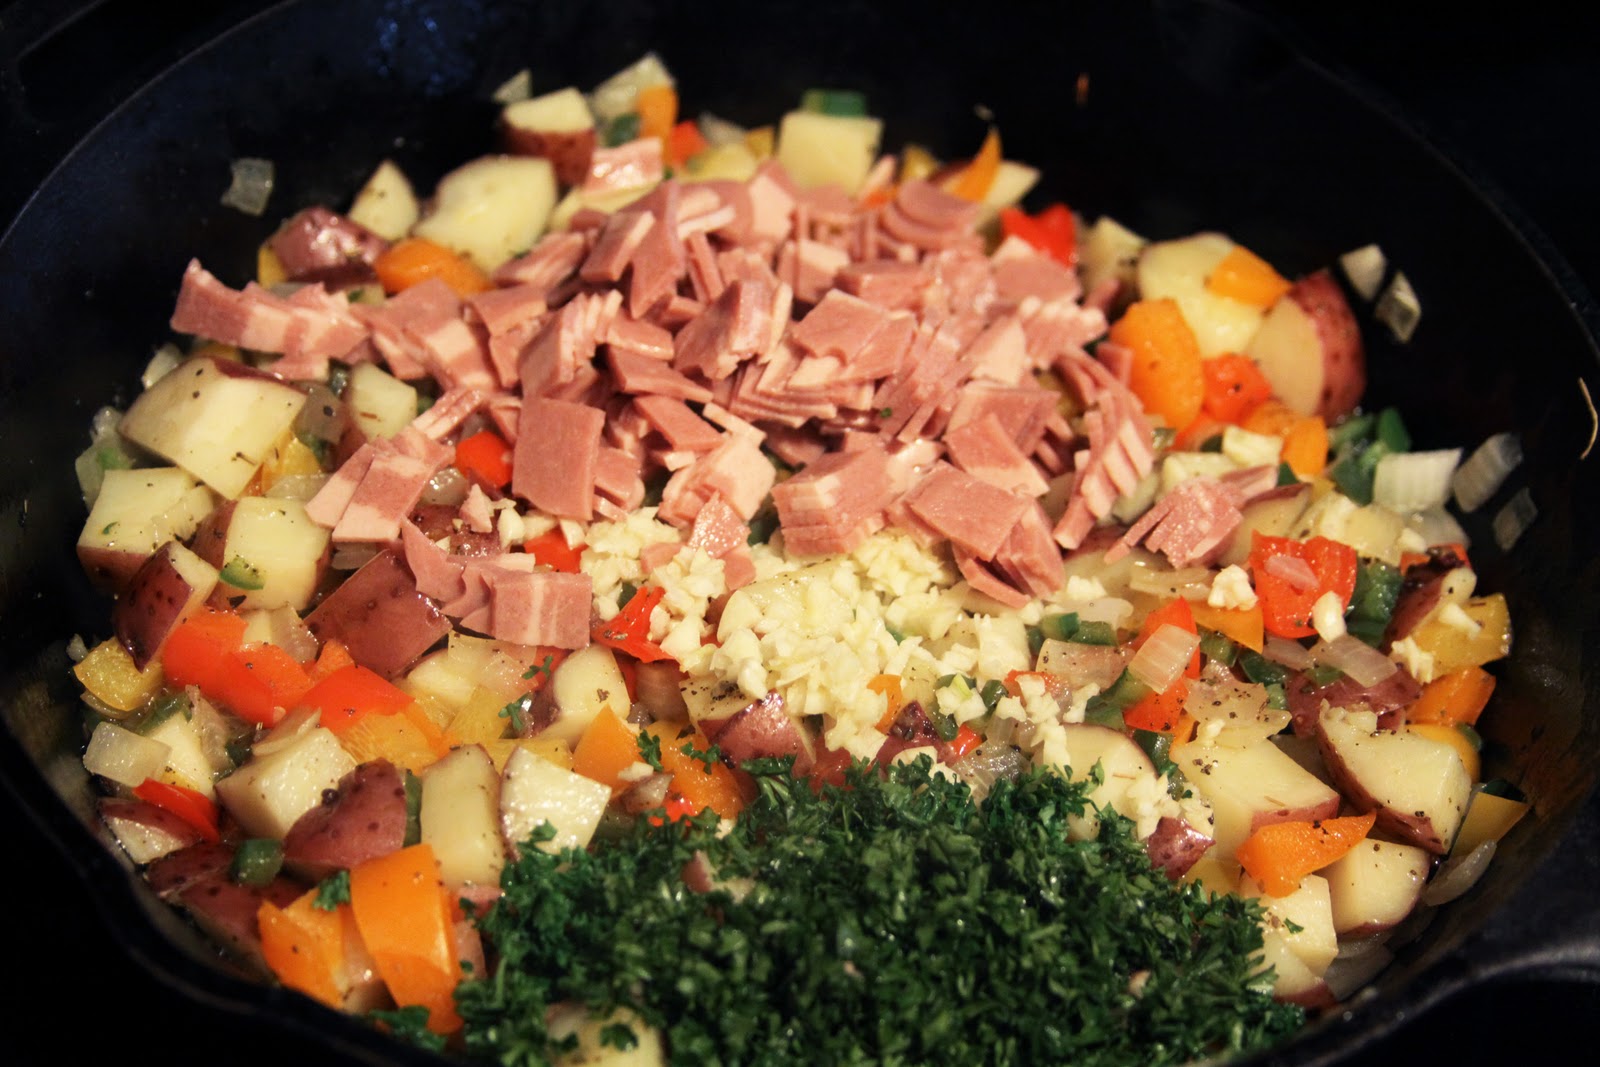
When the potatoes are almost completely tender, add the garlic, bacon, parsley, and cumin.  Stir to combine and let cook until the garlic is very fragrant and the potatoes are soft.  If you want, you can use regular bacon but add it to the pan at the beginning with the onions and potatoes and only use 1 tbs oil.  It's quite a bit greasier than my bacon so it'll lube the pan up all by itself once the fat renders out.


Oh goodness, smell that garlic!  Add a touch more salt if you think it's necessary.  You must taste throughout the process to get the right flavors!


While your skillet is finishing up, get a pot of salted water boiling.


I have these cute little egg poachers from my personal Heaven, Crate and Barrel.  I've tried many times to poach eggs the old-fashioned way but it's very difficult to get right without having boiled egg ribbons all over your pot so go ahead and spend the $4 to get one.  It's totally worth it.


Boil the eggs until the whites are almost completely opaque.  I found myself needing to use a spoon to flip the egg over in its little cup to properly cook the top.


What you end up with is a relatively quick, healthy, hearty breakfast that will keep you full well past when you think you should be eating lunch.  That's always a plus for me.  Cereal or smoothies sometimes just don't do it and I'm hungry an hour later.


Not so in this case.


The egg puts that perfect finishing touch on this dish.  When you split it open and the gooey yolk spills out over the potatoes and veggies, it adds this wonderful softness and creaminess to an otherwise rather business-like meal.  You can easily make this dish vegetarian by leaving out the bacon and egg, but what's life without bacon?  Yeah, that's what I thought.

Saturday, October 2, 2010

Banana Chocolate Chip Muffins

I used to only grudgingly eat bananas when my dad told me I needed to eat them before playing soccer.  Something about being told to do it made this otherwise delicious fruit not taste good.  Now that I decide for myself what to eat, I love bananas.  Sometimes I buy too many though (as many of you may have done as well), and they start to get brown and soft.  Even though they aren't so perfect anymore for peeling and eating, they are perfect for baking. I found this recipe in its original form in Food & Wine.  Like I do, I changed out the white flour for whole grain and the sugar for honey.  The only things you need to change when making this substitution are to lower your oven temp a little and use about 25% less honey since it's sweeter than sugar.  The honey caramelizes more than sugar so the final product will be darker in color but not at all burnt so don't worry.  I also used dark chocolate because I like how the delicate bitterness tones down the sweetness of the rest of the ingredients. 

Makes 36 muffins:
2 cups mashed overripe bananas (about 6)
1 cup honey
1 1/2 sticks unsalted butter, melted
3 large eggs
2 3/4 cups whole wheat flour
2 1/2 teaspoons baking soda
1 teaspoon salt
1 1/2 cup dark chocolate chips (10 oz or almost a full bag)


Mix the dry ingredients (besides the chocolate) in a bowl and set aside.


Mash the bananas in a mixing bowl until smooth.


 Mix in the butter, honey, and eggs.


 Then slowly add the dry mix until smooth.  You may need to scrape down the sides from time to time.


Add the chocolate chips and hand mix until thoroughly incorporated.  


Fill your muffin cups almost to the top since these don't rise much.


 Bake at 325 degrees for about 25 minutes or until a toothpick comes out clean.


Josh and I both have a bad habit of eating these before they're cooled properly.  We have the burns to prove it.  It's just so hard to resist chocolate chips all melty and fresh out of the oven!


Josh loves these muffins for breakfast.  This particular batch only lasted 3 days just between the two of us because he took about half of them out to a multi-day field job and barely ate anything else.  I can't really blame him.  All the guys at the site ever buy for the crews is pizza and fried crap.  Even still, these muffins are amazing and if he hadn't taken them away, I would have scarfed them up for myself.  It's dog-eat-dog in our house with my cooking.  If it's yummy, you'd better eat it before someone else does.  Maybe that's why we can't seem to lose weight...oh well.  I don't make the muffins every day so they're a nice treat.  They're whole grain and use honey and bananas instead of sugar so there are way worse things you could snack on.  Enjoy!

Tuesday, August 10, 2010

Summer Vegetable Casserole

I generally hate zucchini.  It has a weird, mushy texture no matter how you cook it and I've always hated it...until Josh's dad's partner made this for us.  I love this casserole.  If I can find a recipe that will make me eat a vegetable I normally dislike, I'll make it often.  In true Meg style though, I added some jalapenos to give it a little extra kick.  The recipe is fine without them, just a little boring and might not give you heartburn.  Your choice.

4 servings:
1 tbs olive oil
3 medium zucchini, washed and sliced into 1/8" disks
2 medium onions, diced
1/2 tsp fresh thyme
2 jalapenos, seeded and diced
salt
2-10oz cans of Rotel diced tomatoes/green chiles
fresh grated Romano cheese


Saute the onions and jalapenos in the olive oil until the onions are soft and translucent.  Add the thyme and season with a pinch of salt.


Spray a 9x9 baking dish with oil and make a layer with half the zucchini slices.


Make another even layer of half the onion/jalapeno mixture.


Drain one can of the Rotel and make an even third layer.


Repeat the three layers once more and top the whole thing with a thin layer of cheese.
Bake at 350 degrees for 30-40 minutes or until the zucchini is tender and the cheese is melted.


So fresh, so healthy, so yummy.  I'm elated that I've found a way that zucchini and I can be in the same room together after all these years.  It's very unlike me to use previously prepared vegetables in my cooking but the Rotel is so yummy.  I might try chopping my own tomatoes next time and playing with seasonings but for now, I'll just be lazy and do it the quick way.

Monday, August 9, 2010

Blueberry Pie

Mmmm, nothing says summer like blueberry pie.  I actually made this over 4th of July weekend but I've been busy getting a job and constantly cleaning up dog hair and washing oil out of Josh's coveralls so I'm just posting it now.  You'll forgive me.  
I loooove my mommy's blueberry pie.  It has even served as my birthday cake a couple years.  That and coffee cake.
Anyway, Josh, his dad, his dad's partner, and I went to pick blueberries the day I made the pie.  They told me they'd do it if I made something naughty and yummy so I gladly obliged.


For an 8 or 9 inch pie crust:
2 cups of flour
1 tsp of salt
1 tsp of sugar
2/3 cup of shortening
4 to 5 Tbs of cold water
Blueberry filling:
1/3 cup of sugar
1/3 cup of flour
1/2 tsp of cinnamon
4 cups of blueberries
1 Tbs of lemon juice
2 Tbs of butter or margarine


Pulse the crust ingredients in a food processor until pea-sized balls form.  The humidity in your house can affect how much water you need so start with 3 tablespoons and add as needed.


In a bowl, mix the blueberries (preferably fresh but if not, then thawed, rinsed, and dried.) with the sugar, flour, and cinnamon.


Toss to coat evenly.


Meanwhile, flour a rolling mat and roll out half the dough until it's just a little bigger than your pie pan, about 1/8" thick.  Gently put it in the pie pan and trim the edges.


Add the blueberries...


...and drizzle the lemon juice on top.  Cut the 2 tbs of margarine into small pieces and put it on top of the filling.


 Roll out the other half of the dough just like the first.  Fold it into fourths, cut off the tip, and score the edges.


Unfold the top onto the bottom half of the pie and crimp the edges with your fingers or a fork.


Brush the top with milk and sprinkle with a little cinnamon sugar.


Bake at 375 degrees for an hour.  As the time draws near, check it and take it out when the crust is golden brown.


Let the pie rest for about 30 minutes so that the inside can reconstitute and not run all over when you cut it.  I know it's tough, but it's worth it in the end.


This is such a delicious crust.  I love pie crust like I love pizza crust.  It just all builds on each other to make a great dish.  Pie brings back memories for lots of people.  Like pancakes or bran muffins, blueberry pie feels like home to me.  It's something my mommy made so between the memories and the taste, this is one of my favorite dishes.

Mushroom Leek Croquettes

I'm having really good luck with recipes lately.  This is another Food and Wine recipe that I was expecting to be so-so and it turned out to be one of the most amazing foods I've ever put in my mouth.  All you need to know is that it's full of cheese, breaded, and fried.  Enough said.  This definitely isn't one of my healthy recipes but it's worth it. 

Recipe makes 12 croquettes:
5 tbs butter
2 leeks, light parts only, thin sliced
4oz dried Porcini (or shiitake) mushrooms, caps thin sliced
salt and pepper
1 tsp chopped thyme
1 tsp chopped oregano
3 tbs flour, plus more for coating
1 c milk
1/2 c shredded Gruyere or Swiss cheese
1/4 c grated Parmesan
2 eggs, beaten with 2 tbs water
1 1/2 c panko
vegetable oil for frying


Melt 2 tbs of the butter in a skillet.  Cook the leeks and mushrooms over high heat until softened. Stir frequently and season with salt and pepper.  Add the thyme and oregano then transfer to a bowl.  In another saucepan, melt the remaining 3 tbs butter, whisk in the 3 tbs flour, and cook over high heat until bubbling.


Add the milk and cook, whisking constantly for about 3 minutes until very thick and bubbly.


Scrape the mixture into the bowl.  Add the cheeses, season with salt and pepper, and stir until combined.


Cut a long piece of plastic wrap.  Make a 14” log with the mixture and then wrap tightly in the plastic.  Freeze for about 2 hrs.

Fill 3 small bowls each with the flour, beaten eggs, and panko and line a baking sheet with wax paper.  Unwrap the croquette log and cut it into 12 pieces.  With floured hands, pat each piece into a 2” round patty and 3/4” thick.


 Dip each patty in the flour...


...then the egg...


...then the panko.


Freeze on a baking sheet for 15 minutes.


Heat the oil in a pan and fry the croquettes until golden brown.  Let them drain on paper towels and serve warm.


Is your mouth watering yet?


How about now?

I know I've made something delicious when Josh takes a bite and gives me that look that says "I want to throw you on the bed right now" and I definitely got that look when he tasted these.  They take a little more planning than I usually tolerate but having made them, trust me when I say that the time is worth it.  The flavors are so delicate and well-balanced, yet vibrant.  This is definitely a recipe that anyone would like.